docs.ktc.de
ContractPlus V1.1 | Contract Management MS Business Central App
Manage your contracts directly in Business Central
The ContractPlus App
The KTC ContractPlus App is a centralized contract management tool for Business Central. Manage and categorize your contracts by customer, vendor, partner and/or direct contracts. Link your original documents, work with a clean auditing trail, and have purchase as well as sales invoices generated automatically. Periodic billing (calendar month, calendar year) becomes a breeze with the ContractPlus app. You create the contract, the app creates the invoice - including the purchase side if you are a reseller. The app differentiates between “automatic billing via sales order” and “automatic billing via sales invoice”. With automatic settlement via sales invoice, the invoice can be created without an associated sales order and adjusted before posting. The system uses the sales invoice to create the corresponding sales order afterwards. With automatic settlement via sales orders, the app manages the sales orders and the associated order settlement for each contract. Thus, you also have your future contractual sales as outstanding orders automatically in the forecast. Custom number series can be assigned for all contract types and dimensions can be used to assign purchase and sales items to a contract and to a customer at item level.
Table of content
- Intoduction ContracPlus App
- Your advantages
- Your added value
- Installation and license management
- Installation
- Permissions to install an extension
- Installation via the marketplace
- Installation from the AppSource
- Extension installation
- Installation progress
- Calling the KTC Licensemanagement app
- Initial set up of the License Management App (new customer)
- Initial setup of the license management App (existing customer)
- Reset password of the KTC License Management App
- Managing KTC Licenses
- Update the application
- Uninstall the application
- User Manual – ContractPlus App
- Licensing
- Initial application setup
- Activate the application area
- Setting up number series and resubmissions
- Setup the dimensions
- Basics
- Settlement of contracts
- Setup the contract dimensions
- Setup the contract categories
- ContractPlus in the Business Central environment
- ContractPlus in the activities
- Contract overview
- Contract tab: Create a new contract
- Master Data
- Hull contract
- Main contract
- Contract lines
- Billing and resubmission
- Responsability and filing location
- Contract information and filing location
- Infobox area
- Attachements
- Links
- Notes
- The toolbar
- The contract
- Process
- ContractPlus in the Business Center role center
- Roles and permissions
Your advantages
- Manage your contracts directly from Business Central
- Bill your contracts automatically on the customer side via the system.
- Automatic generation of sales invoices
- Connection of MS SharePoint as DMS via the SharePointPlus app
- Keep track of terms, cancellations and contract extensions
- Categorize your contracts
- Assign responsibilities to the contract
- Add documents and notes to a contract
- Store dimensions, remarks and search terms to the contract.
- Supported languages: English, German, Italian, French, Dutch, Spanish and Portuguese.
Added value
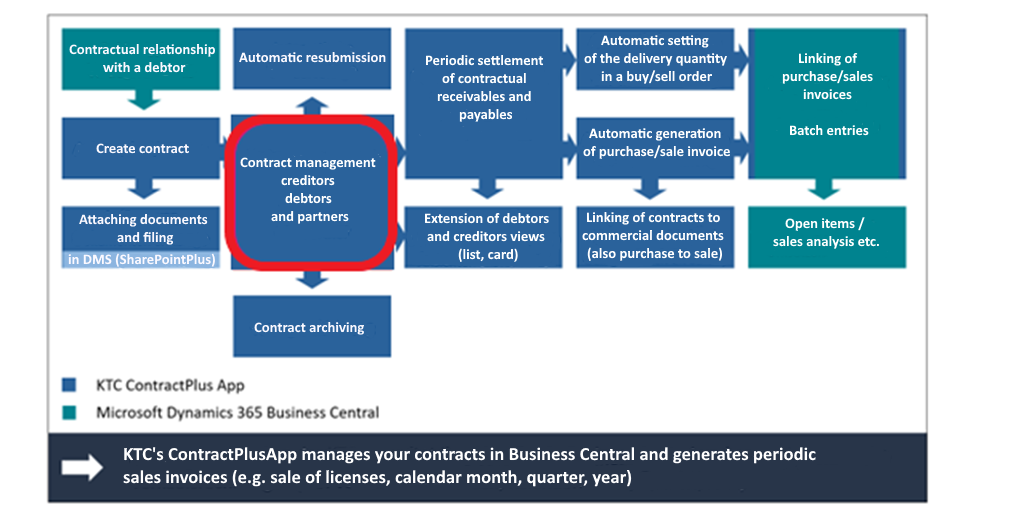 Fig.1 Added value through the ContractPlus app
Installation and license management
Installation
Please note that ContractPlus is only available from version 21.0. This means that your environment must be updated to at least version 21.0 for ContractPlus to be operational at your site.
 Fig.2 Installation and Configuration Process
Permissions to install an extension
The company administrator must grant you the following permissions in Business Central to install a KTC extension in your environment: D365 EXTENSION MGT or EXT MGT. - ADMIN.
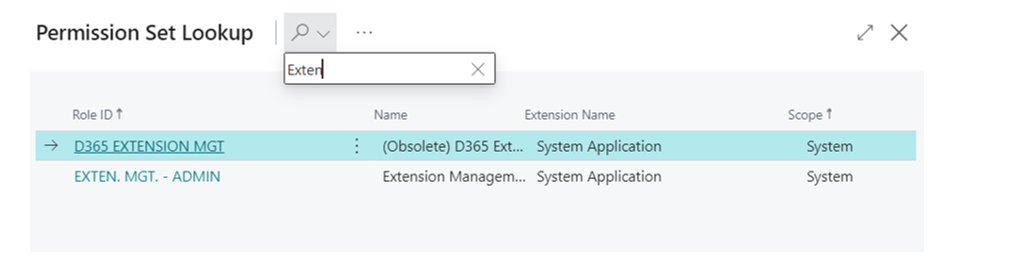 Fig.2 MS D365 BC - Permissions
Installation via the Marketplace
The KTC ContractPlus app can be installed directly in Business Central via the Marketplace for extensions. Enter Marketplace in the search and select Marketplace for Extensions.
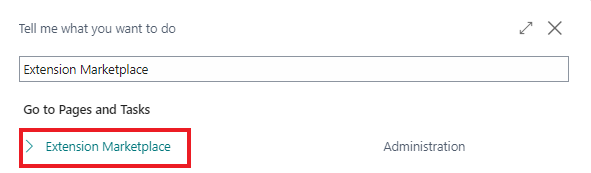 Fig.3 Microsoft Marketplace for Extensions (AppSource).
In the Marketplace search, type ContractPlus and select the app shown below.
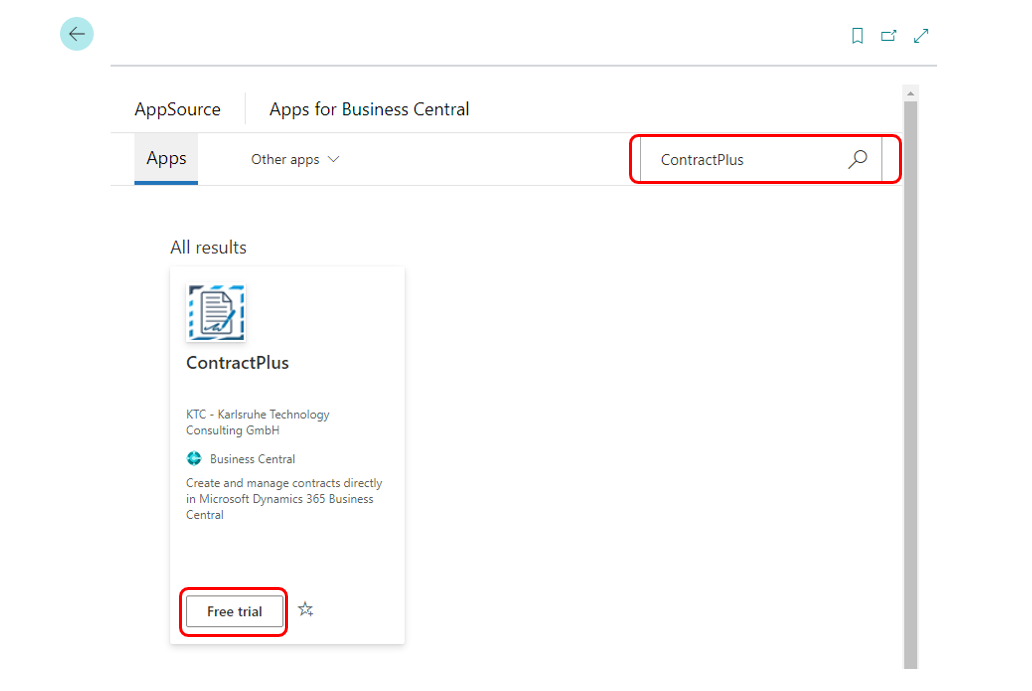 Fig.4 Marketplace ContractPlus
Click on “Free trial” to enter the extension installation.
Installation from the AppSource
You can also install the app directly from the Microsoft AppSource. To do this, log in to the MS App Source and search for the ContractPlus extension.
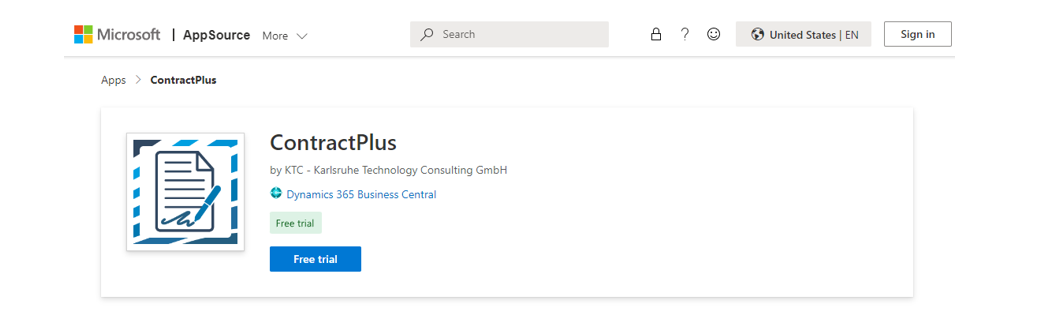 Fig.5 ContractPlus directly in MS AppSource, call via browser.
Also in this overview, you can add the application to your Business Central environment using the “Free trial” button. Click on the “Free trail button and you will be redirected to your Dynamics 365 Business Central. You will be presented with a window where you can select which environment you want to install the extension on.
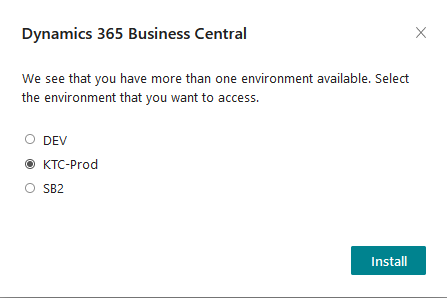 Fig.6 Dynamics 365 Business Central - Selecting the environment.
By clicking Install, you will be redirected to the extension installation.
Extension installation
The ContractPlus extension can only be used with the help of licensing. For this purpose, the KTC License Management App is automatically downloaded in the background when you install the extension. This app is used to manage all licenses for KTC applications (see Calling up the KTC License Management App). In the extension installation you can choose from the different languages of the ContractPlus extension. The supported languages are: English, German, Italian, French, Dutch, Spanish, Polish and Portuguese. If your BC is set in a language that is not supported by ContractPlus, the extension will be installed in English by default.
 Fig.7 Extension installation: Language selection and installation
Clicking Install will install the application in your environment. The installation of the app may take a few minutes. Once the extension has been successfully installed, you will see a message. Clicking OK will take you back to the start screen.
Installation progress
To see the successful installation or the installation progress of extensions, enter Extension Management in the search and go to the corresponding menu item. Via the item Manage you can now get to the installation status view.
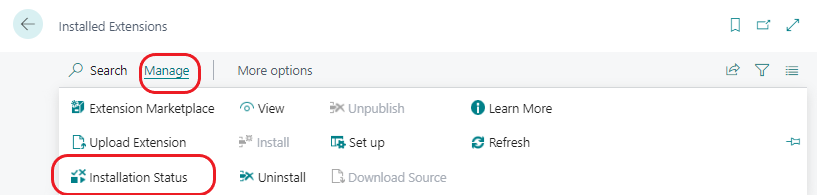 Fig.8 Checking the installation status
An extension is completely installed and ready for use when the status is completed.
 Fig.9 Installation status: completed
Calling the KTC License Management App
As soon as you install an app via the Marketplace or MS App Source, you must set up the KTC License Management App in order to use the corresponding app. If you do not have the KTC License Management App yet, it will be installed together with ContractPlus. This app connects to the license server and lets you retrieve and manage the available licenses.
Important:Please note that ContractPlus is not operational without the license management. Before the ContractPlus App can be started, the KTC License Management App must be set up.
Important To access the KTC License Management app, you need SUPER or LIC LICENCE USER KTC rights.
To open the license management, enter “KTC Liz” in the search and select the KTC License Management app.
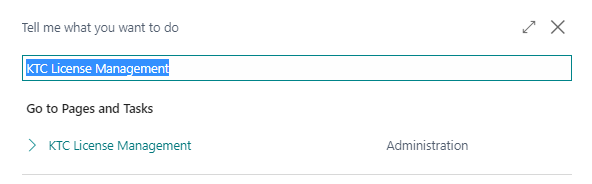 Fig.10 Opening the KTC License Management App
Initial setup of the License Management App (new customer)
To use ContractPlus as a new customer of our programs, please open KTC License Management first. The program will be installed automatically as soon as you have obtained ContractPlus from AppSource. To do this, enter License in the search mask and select the management program KTC License Management.
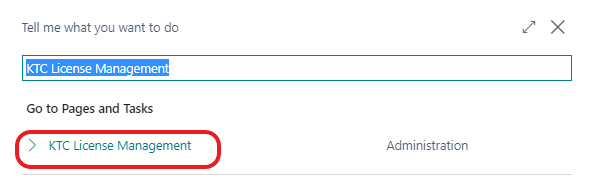 Fig.11 Calling up the license management
When you initially start the KTC License Management App, your tenant ID is not yet set. This will be determined and set automatically in the next step.
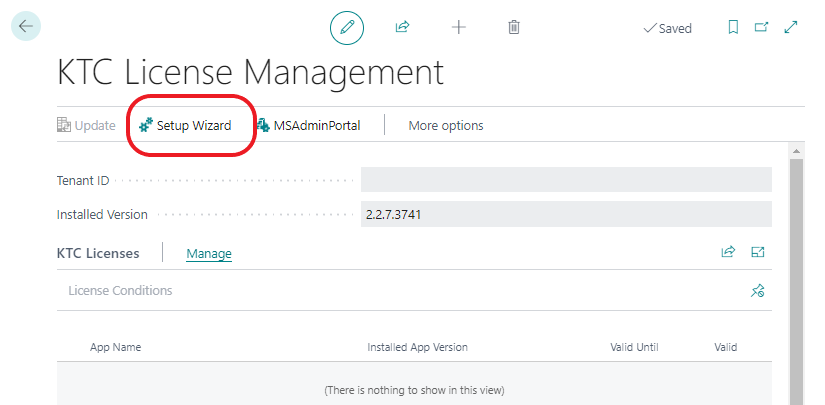 Fig.12 Setting up the KTC License Management Extension
Start the setup wizard and enter your company name and e-mail address. All KTC extensions will be associated with this company name and email address.
Attention: You will need this e-mail address to recover the access data. For billing purposes, another e-mail address can be stored later. Please read the license agreement and confirm that you have read and accept it.
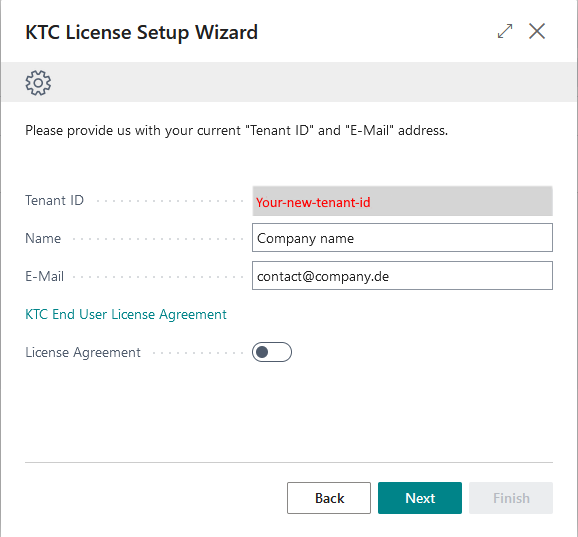 Fig.13 The KTC License Setup Wizard
Then confirm your input with Next. The KTC will now automatically generate a password for you, which you can use to log in to the license management.
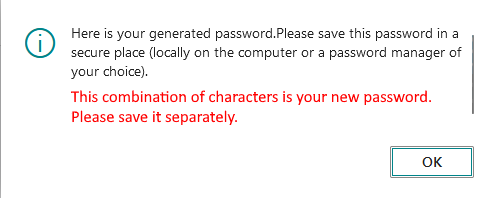 Fig.14 KTC License Management Password (License Key)
Click OK to save the information. In the next window, click Done to complete the setup. The ContractPlus extension will now automatically appear in the overview of applications licensed through KTC.
Note: For security reasons, we do not save your password. Please save your password separately. You will need your password if you want to install the License Manager in additional environments such as sandboxes (e.g. multiple installations in different tenants with the same tenant ID). Forgotten passwords are always replaced by new passwords by the system.
Initial setup of the License Management App (existing customers)
Since you have already installed a KTC Extension, you are already registered for the KTC License Management App. Accordingly, you already have access. To complete the installation of the ContractPlus Extension, open the setup wizard of the KTC License Management App (e.g. via Search -> KTC License Management).
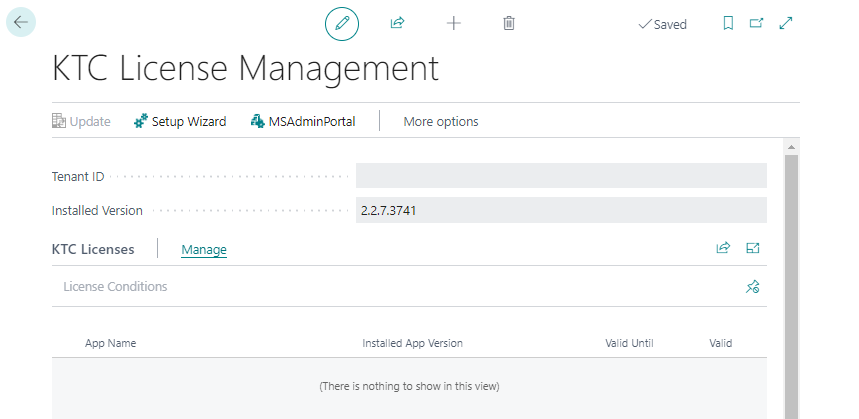 Fig.15 Setup of the KTC License Management Extension
After opening the setup wizard, please enter your existing credentials to install the new extension on your tenant. Your tenant ID will be automatically filled in for you, so you only need to fill in your email and password. If you have forgotten your password, you can request a new one via “Forgot your password?” (cf. Password of the KTC License Management App ).
 Fig.16 repeated setup of the KTC License Management AppExtension
After that, please go to “Next”. The setup of the KTC License Management App is now complete. All valid and available KTC licenses are automatically imported from the KTC license server. The ContractPlus App is now installed and appears in your license overview.
 Fig.17 License overview
The setup of the KTC License Management App is now complete. You can now use the ContractPlus App.
Reset password of KTC License Management App
You can use the Forgot password? function to generate a new password (= license key). A new tab will open where you enter the email address linked to the license and click on “Submit”.
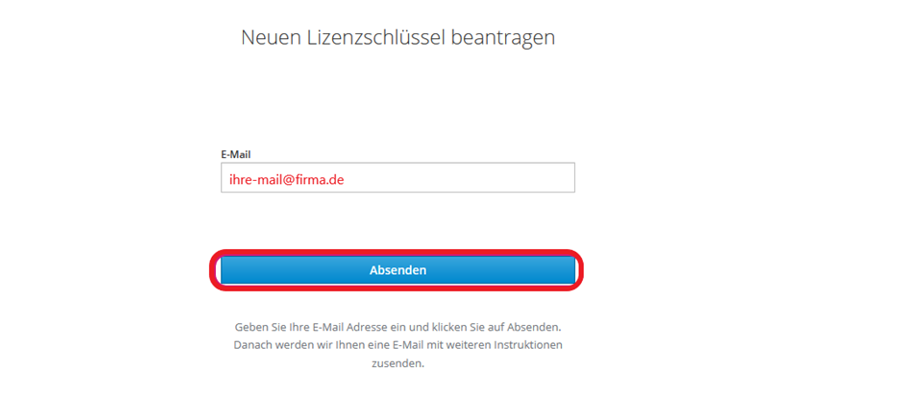 Fig.18 reset password (license key)
A link will be sent to this e-mail. Click on the link to get the new password. Please save it separately. The old password hereby loses its validity.
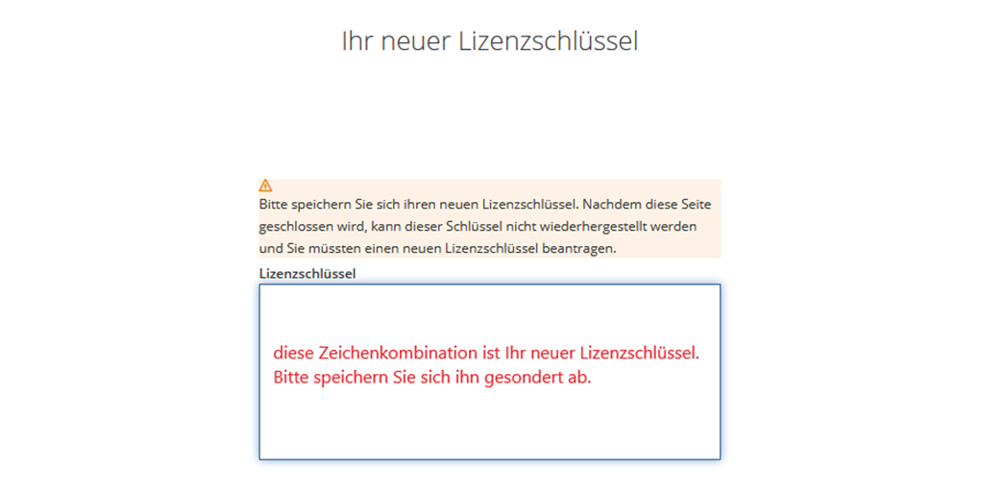 Fig.19 Get new password (license key)
Managing KTC licenses
If you want to check the status of your licenses, open the KTC License Management App and select the application you want to check (1) and click Update (2). In the overview you can see if the license is valid, if you need detailed information you can find more information under Manage.
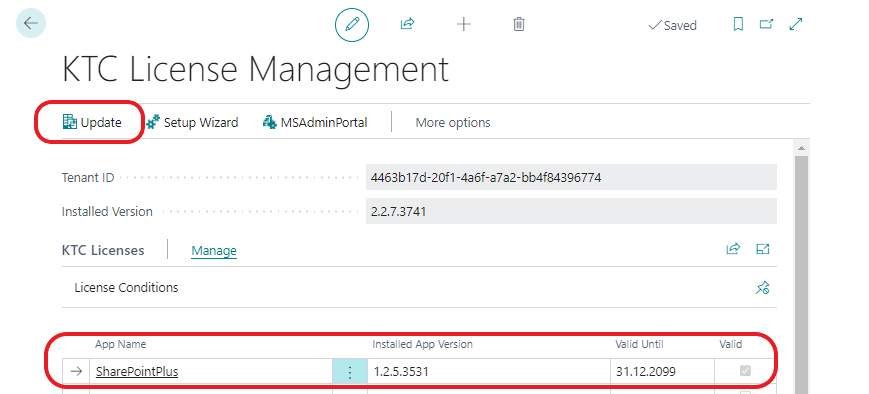 Fig.20 Manually check installed licenses
If you don’t want to use the app anymore, you can mark the installed apps in the extension management and uninstall them.
Updating the application
The application is updated through the Microsoft Dynamics 365 Business Central Admin Center. The KTC License Management App will also show you if there are new versions of the KTC extensions.
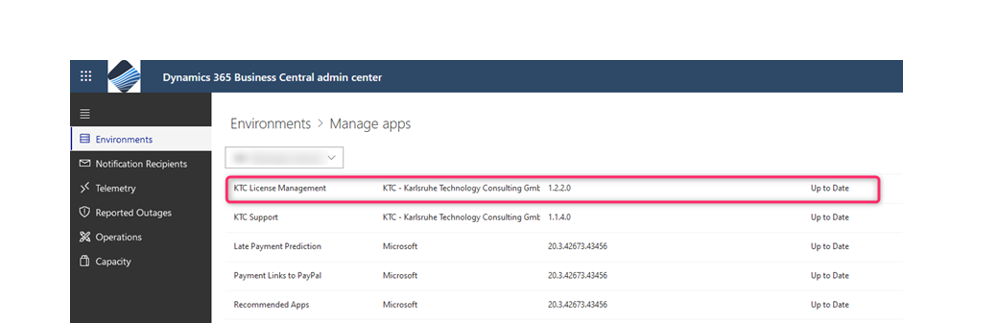 Fig.21 Open the Microsoft Dynamics 365 Business Central Admin Portal.
To open your app overview, go to Environments manage apps to see a list of installed apps. In this list you will see, among other things, the installed version and the information whether “your” version is also the current one (see Fig.21).
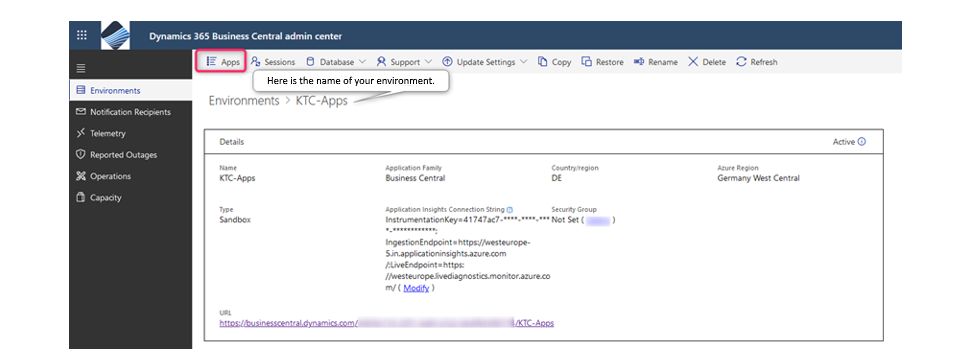 Fig.22 Selection of the environment in the Dynamics 365 Business Central Admin Center
If necessary, you can update our application to the latest version here. To do this, you first need to select the extension you want to update. To do this, go to Apps -> Manage Apps -> Update. The KTC License Management and ContractPlus applications will now be updated to the latest version. Once the update is complete, you can exit the Admin Center and continue working with the applications in your Business Central environment.
Uninstalling the application
In the Business Central activity summary search, type “extension” and select extension management.
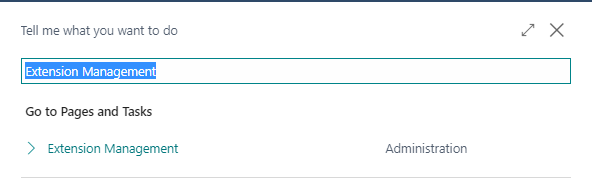 Fig.23 Calling up the extension management
Select the KTC License Management App and choose Manage -> Uninstall. Alternatively, you can click the Yes that appears in front of the KTC Licence Management app in the Extensions overview. In the next window, select whether you also want to delete the data created in the extension and confirm the installation by clicking Uninstall. The application will be removed from your system now; all data of this application will be deleted.
Note: If KTC License Management is uninstalled, the use of the SharePointPlus extension as well as other of our products is no longer possible.
User manual - ContractPlus App
Licensing
The ContractPlus App provides various licenses. Licensing is done through the KTC License Management App that is installed with the app). When you download and install the ContractPlus App in the Marketplace or MS AppSource, you automatically receive a 30-day trial license. After the license expires, to continue using ContractPlus, contact us by email at Anfrage.D365BC-Apps@ktc.de, with information about the number of users you have. The current prices of the ContractPlus App can be found in the ContractPlus Flyer. To use the ContractPlus App, you will need the CNP LIC User KTC.
Initial application setup
Important: In order to access the ContractPlus App setup page, you must have SUPER or CNP ADMIN KTC rights. To use the ContractPlus App, you need either the trial license or a purchased license. The rights you get with the licenses are called CNP LIC User KTC.
Activate the application area
Type ContractPlus in the search bar and select the ContractPlus setup to perform the setup.
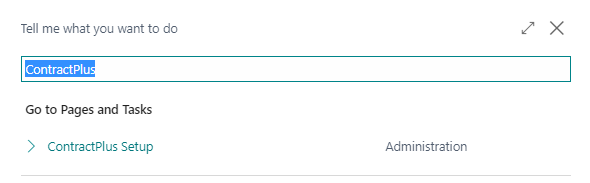 Fig.24 ContractPlus setup
In the administration area of ContractPlus you can activate or deactivate the application in the current client. So you can define individually which clients can work with the ContractPlus extension.
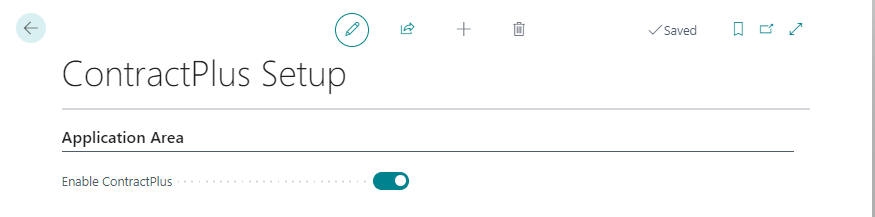 Fig.25 Activate ContractPlus
Without activating the button it is not possible to use ContractPlus in the selected client. After pressing the button Activate ContractPlus, the window will be closed automatically. For further setup, you have to call up the ContractPlus setup again via the search.
Setting up number series and resubmission
When the app is activated, it is necessary to define some initial settings in the Setup subitem. A separate number series can be defined here for each contract type.
Attention: The number series must be different, otherwise different contract types will be classified in the same series. This can lead to incorrect evaluations.
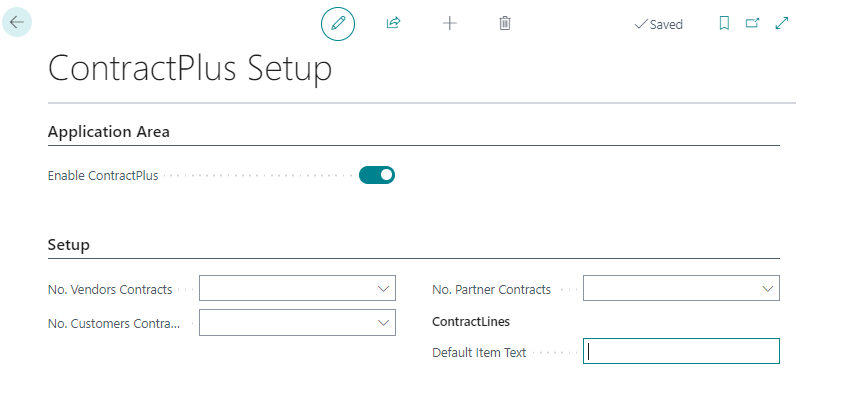 Fig.26 Setup of the number series
 Fig.27 Is the resubmission person or team oriented
If you want to look at a contract again before you renew it or cancel it on time, you can use resubmission. When you create the contract, you specify a date on which the contract should be viewed again and, if necessary, edited. In the contract card, you can assign a responsible employee to each contract who will take care of it. If you want the reminder about the contract to be sent to all employees of the responsible team, activate the Team Resubmission switch here. This way all team members will be informed.
Example: For a sales contract, the team leader of the sales team is defined as the responsible person. Since Team Resubmission has been activated here, the contract is placed on resubmission in the role center for each individual team member behind the Contracts tile.
Setting up the dimensions
ContractPlus uses dimensions to assign contracts at the item level. You can also define these in the ContractPlus setup.
 Fig.28 Setting up the dimensions
The Contract Type dimension is used to categorize the contract and is automatically set using the Contract Category. The Contract Number dimension is an automatic dimension that also stores the contract number in the dimension. This simplifies a later evaluation considerably, since the contract number is available on item level. For the direct contract, this is the contract number without customer or vendor suffix. The dimension Customer expects the customer number in the dimension. This dimension can be used to assign contracts to customers at item level; this is especially true for the credit-side contract in third-party business. The customer number dimension is automatically updated once a day. All your customers are automatically stored here. The respective dimension value here corresponds to the customer number. This dimension is useful for direct contracts, as it helps in the evaluation to assign individual purchase items to the customer.
Example: You add the customer “Wayne Enterprises” to your file. This customer now receives the customer number “D00460”. All contracts related to this customer will now receive the dimension CUSTOMER with the value D00460 from the system. This allows you to evaluate not only contracts, but also the individual items from the contracts in relation to the customer.
Setup: Delete archived contracts
 Fig.29 Delete archived contracts
This function allows you to delete archived contracts. Further, you can define which type of archived contracts should be deleted and which should be kept. In total, you have three different options to choose from here: archived customer contracts, archived supplier contracts and archived partner contracts. Only contracts that also correspond to these contract types are affected by these settings.
Basics
Settlement of contracts
The flow of goods involves several steps. In the graphic, you can see that ContractPlus handles much of the commercial process for you. This gives you time for other aspects of your business.
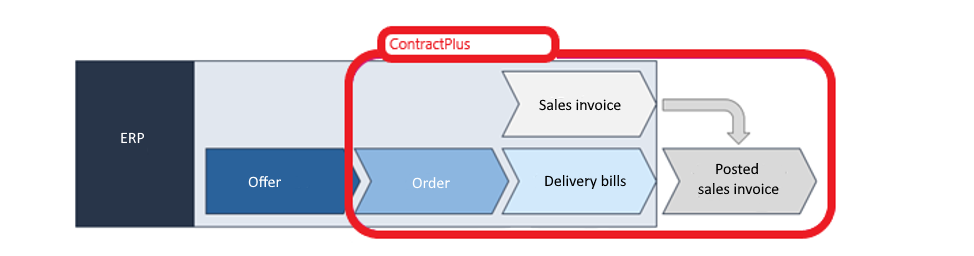 Fig.30 Settle contracts
Contracts can be billed in a number of ways. Two ways supported by Business Central are sales invoice billing and sales order billing. Using ContractPlus, you can bill contracts in both ways. All contracts created in ContractPlus are associated with contract categories that allow you to specify which way the contract should be billed.
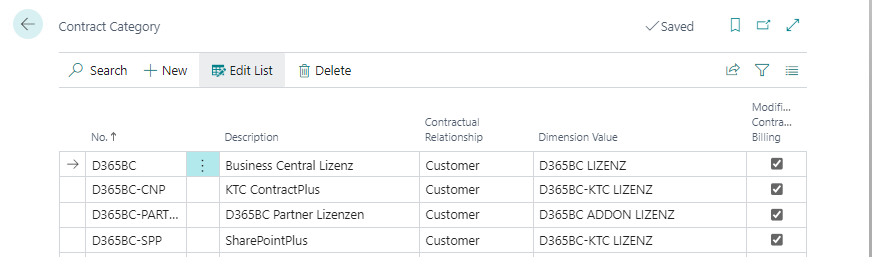 Fig.31 Contract categories
The contract categories are freely definable by you. Please note that only automatic billing via the contract can be activated in the categories. If you prefer to bill the contracts manually, leave the box unchecked.
Contract types
ContractPlus distinguishes four types of contracts, which are described below.
Customer contracts are contracts that you sign with your customers. Therefore, they are also called customer contracts. In ContractPlus, you can settle them either through the respective sales orders or through the sales invoices. Vendor contracts, on the other hand, are the contracts you sign with your suppliers. In ContractPlus, you can use this type of contract to create both purchase contracts and purchase invoices. Partner contracts are contracts that have no contracts on either the purchasing or sales side. Instead, they describe the merger of two or more companies so that they can function as a single entity. For example, you can use partner contracts to sell goods and services that your company has developed jointly with another company. You can manage purchase and sales contracts that result from partner contracts through ContractPlus. Direct contracts are for goods or services that are purchased and resold directly (on the customer and vendor side). These are sometimes also referred to as drop shipments or reselling. Here, you merely act as an intermediary; as the manufacturer usually fulfills the contract directly with the customer, without you having to pay for things such as warehousing or delivery costs. ContractPlus links the contracts needed for this together for you. You won’t find a separate contract category for this in ContractPlus.
Set up the contract dimensions
This is where you create the dimension values for your contract categories. Based on these values, you can later evaluate your contracts. To do this, first search for “dimensions” in the search mask.
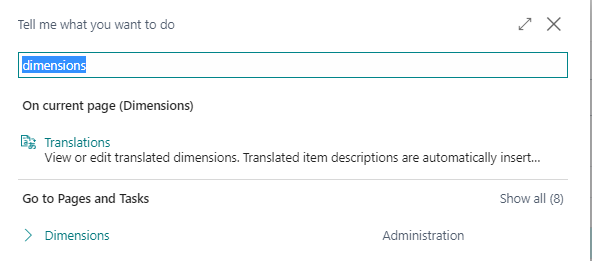 Fig.32 Manage the dimensions
First select the dimension you want to maintain. Then, via the Dimension tab, select the Dimension Values button. There you can then edit already existing dimension values or create a new value with an associated code as well as name using “+New”.
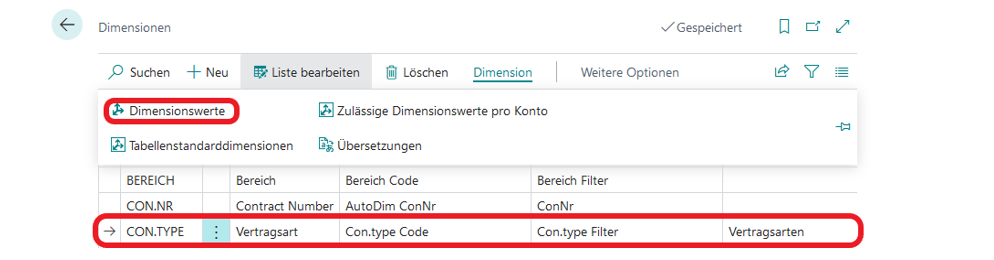 Fig.33 the dimension “Contract Type
Setting up the contract categories
Important: The ContractPlus app must be fully set up to manage the contract categories. Please refer to 5.3 Initial application setup for more information.
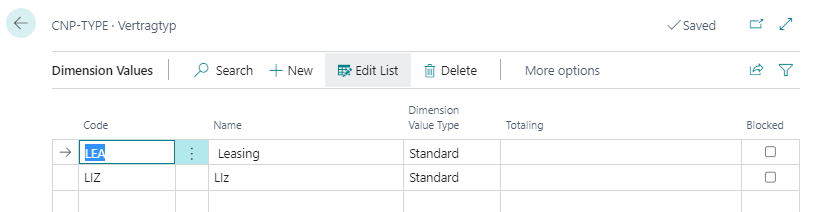 Fig.34 Dimension values for contract types
After the dimensions for the contract types have been entered, the contract categories can now be created and assigned to one of the defined dimensions. Contract relationship defines the relationship we have with our contract partner. These are then of course dependent on the contract type. Each contract type maintains its own contract relationship, on which the conditions of the parties involved depend. These relationships are: Customer, Supplier, and Partner. Number and description can be freely defined here, while the relationship is selected from one of the given options. Under Dimension value the dimension for this category is defined. All entries of this category are now automatically assigned to the stored dimension.
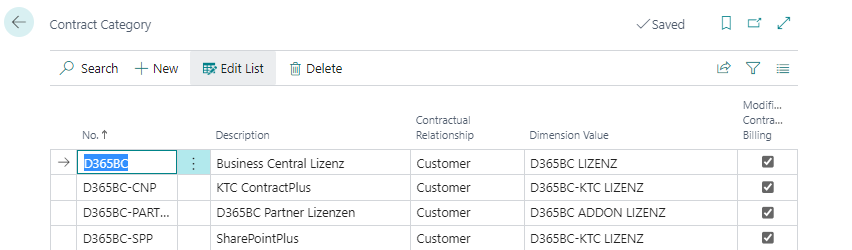 Fig.35 Manage Contract Categories
The automatic billing of a sales order is a default value for this category. It determines whether the entry will be billed along with the sales order. You can activate or deactivate this option here. An individual setting is possible for each entry in the list. Changeable contract billing determines whether quantities can be adjusted for each billing interval in this contract category. This is useful if your customers (or yourself) do not need the same quantity every month. You can also enable or disable this option here, and set it individually for each entry.
ContractPlus in the Business Central environment
ContractPlus in the activities
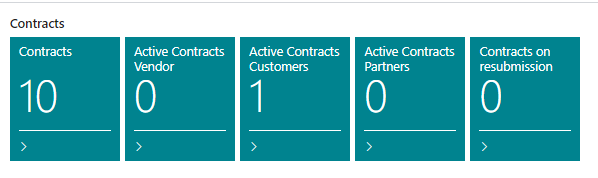 Fig.36 ContractPlus “Tiles” in the Role Center
Your contracts are distributed here on a total of four tiles. The left tile, Contracts, opens an overview of all your contracts. Here you can also create new contracts. The second tile from the left, “active contracts customer and supplier” shows you an overview of all direct contracts. The third tile titled “active contracts vendor” hides a listing of all customer contracts. Under “Contracts on Resubmission” you will find those contracts that are soon due to be viewed again, provided you have marked them for resubmission (see Billing and Resubmission).
Contract overview
Clicking on one of the tiles in the activities takes you to a list overview of the contracts stored here. In this view, the contracts can be shown or hidden using various filters.
 Fig.37 : Contract overview
The following information is displayed in the contract overview:
- Contract number
- Contract partner
- Contract name
- contract category
- automatic billing via contract
- automatic billing via invoice
- Days until next possible termination date
- Next resubmission
- Status of
- Terminated by
- Contract relationship
All of this information is read from the respective contract tab and adjusts depending on the processing status.
 Fig.38 : The “Contracts” tab in the overview
In the contracts overview, you will also find various tabs that contain additional functions of ContractPlus. For example, in the Contracts tab you can view customer, supplier or partner contracts that are linked to the contract selected in the overview. In the Contract Archive you will find already archived contracts, and in the Categories you can customize, add or modify imported categories. In the Home tab, you will find management options for the selected contract. For example, you can renew the contract if the automatic renewal has not been activated. You can archive your entries, mark them for resubmission or restore archived contracts.
 Fig.41 : the “Process” tab in the overview
Contract tab - Create a new contract
Clicking on “+New” will take you from the contract overview to a new screen where you can create a new contract. Fields with a gray background are filled in automatically; you do not need to enter any data here. Fields marked with a red asterisk, on the other hand, are mandatory fields; you must enter data in these fields.
Master data
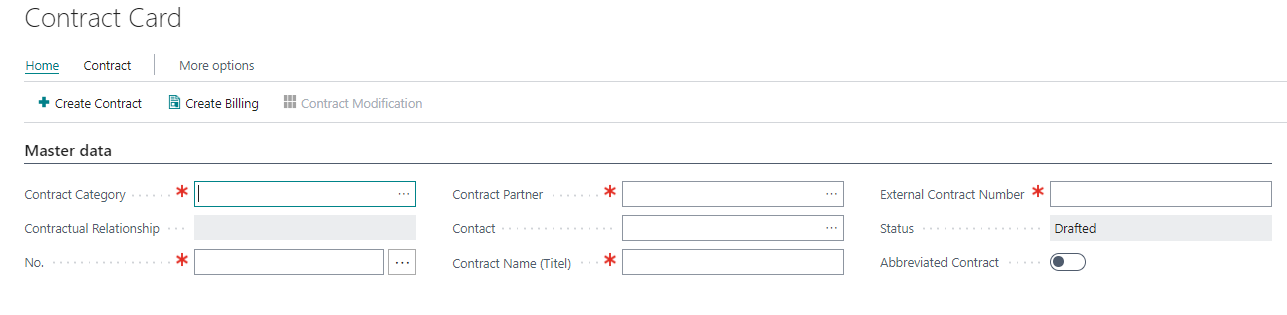 Fig.42 : Master data of the new contract
Here you first select a previously created contract category via “…” (cf. Setting up the contract categories). The contract relationship will be filled in here automatically and matching the selected category. The contract number will also be added automatically and continuously; however, if you want a special contract number, you can select it under “…” or create it freely by clicking on “+New”. At Contact you can link an already stored contact with “…”, create a new one or enter your information via free text.
Important: These are not linked to your database. Under Contract name (Title) you can assign a name to your contract. If you already have your own contract number from the other party for their files, there is space in the External contract number field to insert it. The status informs you about the current state in the contract overview. States can be for example: draft, active, cancelled, terminated.
With the switches automatic billing via sales order and automatic billing via sales invoice you can automatically create a sales order with the contract creation. The order is linked in the main contract (see Main contract) and logged in the contract history. The creation takes place in the background; you do not need to do anything more for this than flip the switch.
The Hull Contract switch activates or deactivates a section of the interface that you can use to insert a predecessor to the main contract. If you are only the intermediary, you can select the Direct delivery option here to be able to enter the corresponding countercontract at the same time. This way you do not have to do this for each side separately.
Hull contract
 Fig.43 Create the short contract
In this mask, only the start date of the short contract is selected. In the following section, you specify the start date of the related main contract; based on this, the application determines and completes the end date of the abbreviated contract for you.
Main contract
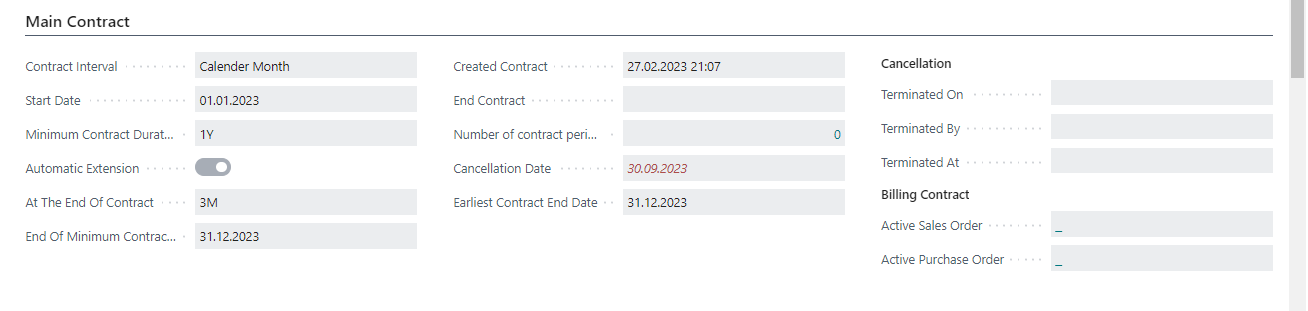 Fig.44 Customize main contract
First of all, the contract interval is entered here: How often should the contract be fulfilled during the term? If you want to execute the contract from the first of the month to the last of the month, select Calendar month here. If you prefer from 01.01. to 31.12., the calendar year is for you. If you would like to settle annually, but not from 01 January to 31 December, you can select annually here. You can then freely select the start date of the contract here. If you have created an abbreviated contract, however, the start date can only be after the abbreviated contract has expired.
Example: If the abbreviated contract is concluded from 01.10. as a transitional solution until 31.12., the main contract cannot start before 01.01. You can specify the minimum contract term and the notice period at the end of the contract, i.e. the last date for proper, timely termination, here using the following abbreviations:
- T -day(s)
- WT - weekday(s)
- W - week(s)
- M - month(s)
- Q - quarter(s)
- J - year(s)
The abbreviations are also stored for you in the tooltip. Automatic renewal can be used if you want the contract to continue as it is, without any intervention on your part, until it is manually terminated by one of the parties involved. The right half of the interface is grayed out and is filled in by the app on its own. This is where data and contacts for billing and termination are added by the system. If you have activated automatic billing via the sales invoice, the associated order will be linked when the contract is created.
Contract lines
The contract line Hull contract will be completed automatically if required. Only the table Contract line Main contract requires your input.
 Fig.45 Contract line main contract (I)
Here, part numbers and descriptions can be entered either manually or inserted from a predefined pool of choices. If you obtain the information from the pool, the subsequent fields Unit code and Settlement price will be added automatically. Otherwise, these must be entered by you. Please note that ContractPlus and Business Central cannot make statistical evaluations of entries that have not been entered into the system accordingly. We therefore recommend that you enter your items beforehand.
 Fig.46 Contract line main contract (II)
If you have entered “Item” in the Type line, two more fields will be added that must be filled in. It is mandatory to enter the supplier name. Of course, you can specify an individual supplier in each line. When the contract is created, each line is assigned its own corresponding order. If you have specified the same supplier in several lines, the items will be combined in a collective order. The corresponding order number is then added in the contract card under “Purchase order number”. With the two fields for the date you can define periods in which the selected contract line is to be fulfilled. If the line is to be fulfilled in every interval, please leave the fields empty. If necessary, accrual templates can still be defined. With the help of accrual templates you will be able to assign income and expenses to an item if the financial side takes place in a different period than the transaction posting. In the Remarks text field you can also use combinations of characters to record various information on the invoice. These combinations are:
%1 - contract number %2 - contract date %3 - period number %4 - billing period from date %5 - billing period to date %6 - Contract status %7 - External contract number
You can also access this listing via the tooltip.
Billing and resubmission
 Fig.47 Billing modalities and resubmission
The first switch specifies whether the open amount is paid in advance and distributed over the contract period or not. If yes, please activate this function. The first billing date is transferred from the main contract (if applicable, short contract). Change it only if special circumstances, such as the first order free of charge, require it.
The payment form code allows filtering by payment types, i.e. check, bank account, cash payment and the like. The payment terms code allows you to find various payment terms that should appear on invoices, payment term 14 days after receipt of invoice for example.
The resubmission is intended to remind you of the contract, so that you can cancel it in time or extend it manually, if necessary. It is not a template to be reused for an identical or similar contract.
Responsibility and filing location
 Fig.48 Responsibility and filing
Both at Contract signer and at Contract responsible person already deposited employees can be determined. Of course, you can also add new employees here. The employees stored here may, but do not have to be identical. Alternatively, you can define a responsible team, if you do not want to assign the responsibility to just one person. If you have activated the Team Resubmission option when setting up ContractPlus, reminders about the contract will be sent to the entire team of the responsible person. Under File Location, you can note where the contract was filed. This can be a URL both on the Internet and on the intranet, or a storage path whose address you could type or copy into it. You can also store the whereabouts of a printed copy; however, since a hyperlink is automatically created here, it leads nowhere in this particular case.
Contract information and history
In the text field under Contract Information you can leave important remarks, additional data and the like directly visible on the contract.
 Fig.49 Information and History
The contract history is where changes to the contract are recorded. These changes could be the order frequency, but also the contact details or changed payment terms. This table is filled in automatically by the system, so you don’t need to worry about this.
Infobox area
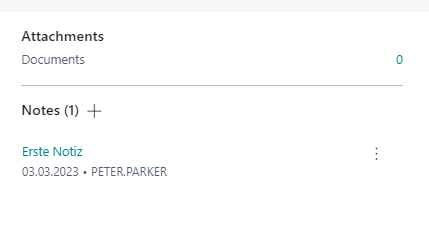 Fig.49 the Infobox
On the right side you will find the infobox where you can attach various things to the contract. You can hide the box by clicking on the i-button.
Attachments
Here you can attach various documents. A click on the displayed number opens the possibility to attach files. You will also find an overview of the documents that have already been attached. You can also access this function via Contract -> Attachments. Supported file formats are:
- .docx and .doc
- .bmp
- .jpg and .jpeg
- .gif
- .tiff and .tif
- .xlsx and .xls
- .pptx and .ppt
- .msg
- .xml
You can also access this listing from the Explorer. By clicking the all supported types option, you can display only files that are compatible with the attachment function.
Links
Hyperlinks that refer to the present contract can be attached and described here .
Notes
There is enough space here for notes that should not appear in the contract information. The notes are sorted by date; under the note content you will find the date and author. The note function is a standard function of Business Central. Unlike the contract information, this is not immediately viewable, but through the posting metadata, have the ability to leave information specific to specific users without the metadata interfering with the body text. Notes are not evaluated or considered for use by ContractPlus.
The toolbar
Under More Options -> Actions, the Contract Modification option is stored. Here you can open the contract for editing after it has been created. Changes made via this function are logged in the contract history.
Contract
Dimensions are metadata about the properties of the contract that make filtering and evaluation easier and more accurate. You can select or create them here. Remarks opens a table where changes, notes, or questions can be noted. These notes do not end up in the contract history. Like the notes function in the info box, this is also a standard function of Business Central. When using ContractPlus, entries in the Notes table are not included.
Process
Contract modification allows the contract to be modified after it has been entered, i.e. saved read-only. For example, it allows you to adjust the contact details or the responsible persons, should the details here change. Cancel allows you to cancel the contract. The status of the contract is set to inactive and the change is recorded in the contract history. Automatic renewals or resubmissions will be disabled. The canceled contract will not be removed from the overview, but you can adjust the view using the filter icon to filter out canceled or inactive contracts.
When all factors have been adjusted to your satisfaction, you can create the contract. The existing data will be saved read-only and linked in the overview. Now you can work on the basis of the contract. If you have activated direct delivery when creating the contract, the system will automatically create and link an associated counter contract. You can then also access this via the order number in the contract line. After the contract has been fulfilled, you can create an invoice here. Relevant files for this you select here from your explorer. Please note that invoices can only be generated for completely created contracts.
If you have activated automatic billing via the sales invoice when creating the contract, you can see here how many billings have already been made for the contract. By clicking on the number you will see a listing of all recorded settlements. You can also see here how many units of the contract lines have been invoiced with which settlement. To post the invoice, click on the corresponding invoice number.
 Fig.50 Overview of settlements
ContractPlus in the Business Central role center
In the role center, you will see an overview of actions that are available to you. At the very top left, you will come back to an overview of which apps you already have installed in your Business Central environment. The ContractPlus app is already anchored in your activity list under the Contracts tab. Under Active Contracts Vendors you will find contracts that exist only between you and your supplier. Under Active Contracts Accounts Receivable, there are only contracts between you and your customers. If contracts are due for renewal, cancellation or similar, and you had marked them for resubmission during creation, they will appear behind the last tile, Contracts on Resubmission, at the time specified during contract creation.
Roles and permissions
There are various permissions in Business Central that you can assign to your employees. On the one hand, this is to distribute the workload and ensure that all employees are authorized to work with the program; on the other hand, it also prevents unauthorized employees from modifying or deleting entries. The different roles also have different rights. A warehouse worker needs different parts of the program, and therefore different permissions, than an accounting employee, for example. These roles are created and managed by Business Central. Permissions relevant to ContractPlus are marked for you in Business Central’s user management with the prefix CNP. To assign a permission to a user, please open the user administration, select the desired user and choose the required one from the list under user permission sets. Via this list you can also remove the given permissions by clicking on -> Delete row. The permissions needed for ContractPlus are:
- CNP ADMIN KTC
- CNP CANCEL KTC
- CNP LIC USER KTC
- CNP MANUAL-POST
- CNP TERMINATION
- CNP USER KTC
For the use of the application the authorization CNP LIC USER KTC is except important, otherwise you do not have stored authorizations for the functions of ContractPlus. You can assign the authorization CNP ADMIN KTC to the head of the company, and CNP USER KTC to all other employees. Please note that all employees who are to use the application must have the CNP LIC USER KTC authorization. This requirement applies regardless of any other authorization. ContractPlus will process all created contracts for you. Therefore, extraordinary termination is disabled by default. In order to perform manual termination, employees must have the authorization. Such authorization is stored in the role CNP TERMINATION (extraordinary termination).